
The Burst Fade Undercut, a stylish and modern haircut, continues to take the fashion world by storm. This haircut is not just a contemporary trend, but a versatile hairstyle that can be sported with unique variations to best suit different face shapes and hair types. The Burst Fade Undercut dives into an in-depth understanding of this popular hairstyle, journeying through its distinct variations and analyzing which combination best fits various physical attributes. The subsequent section presents a comprehensive, step-by-step guide to crafting your own burst fade undercut. The engaging guide delivers profound insights into the essential tools, cutting techniques, fading nuances, and styling tips needed to perfect the look.
Understanding the Burst Fade Undercut
Understanding the Burst Fade Undercut
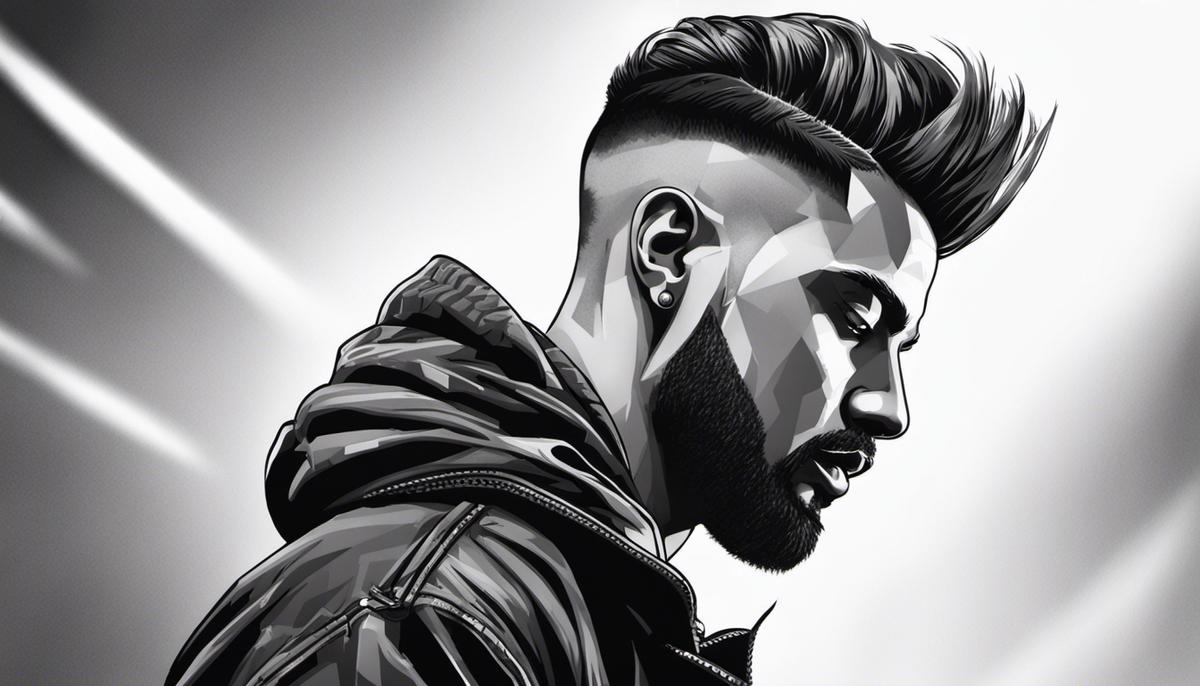
The burst fade undercut is a popular hairstyle that emerged from barbershop culture and has recently made its way into mainstream fashion. It is named for the ‘burst’ of shorter hair that radiates from the back of the ear, and the ‘fade’ that describes the seamless transition of hair length from long to short.
The ‘undercut’ aspect of this style refers to the technique in which the back and sides of the hair are kept significantly shorter, or even shaved, while the hair on the top remains longer. This contrast between the top and the sides is a major characteristic of the style and can be adapted based on personal preference for depth and visual impact.
Variations of the Burst Fade Undercut
This hairdo comes in varied forms to suit different tastes and styles. Some people prefer a minimal burst, with less pronounced differences in hair length, while others opt for a dramatic variation that features a very noticeable and bold burst effect. For a modern spin, consider a burst fade mohawk, or a burst fade with a design etched into the back or sides.
In celebrity circles, you might recall a burst fade undercut on Usher, who often chooses this hairstyle for red carpet appearances.
Identifying the Right Look
The perfect burst fade undercut depends heavily on your personal style, hair type, and facial structure. Ideally, curly or wavy hair types create an enhancing, voluminous effect with this hairdo, but it also looks great on straight hair.
When considering facial structure, the burst fade undercut adds a wider appearance to the lower half of the face, and hence, is better suited to people with long or oval face shapes, although it can be adapted for round or square face shapes with the right tweaks.
Choosing the Right Burst Fade Undercut
While choosing the burst fade undercut, it’s crucial to consider economy and maintenance. While it’s a relatively low-maintenance style once cut, frequent trims will be needed to maintain the fade and the undercut.
Also, keep in mind that this style entails a bit of morning effort. To finish, use a blow dryer and a brush to get initial volume, then use a matte or low shine pomade to shape the top of your hair while keeping the undercut clean and sharp.
It is always best to discuss it with a professional stylist or a barber to achieve the specific result best for your facial structure, hair type, and overall aesthetic.
In conclusion, the burst fade undercut is a versatile, modern hairstyle that can be adapted to fit anyone’s aesthetic, making it an excellent choice for those seeking a fresh perspective on classic haircuts.

Photo by bayleejadegramling on Unsplash
Step by Step Guide to Create a Burst Fade Undercut
Tools Needed to Create a Burst Fade Undercut
To create a burst fade undercut, you require a few hair grooming tools. You would need a good quality hair clipper with different guard sizes, a small pair of hair scissors, a thin comb that has closely set teeth, hair styling gel or pomade, and a hand-held mirror.
Cutting the Hair
Starting with damp hair, use scissors to cut the top to your desired length, leaving it longer for more styling possibilities. The key here is to cut in sections, making sure all parts are even. Using a comb and your scissors, move across the top of the head, cutting to achieve the desired length.
Fading the Hair
The next step is to fade the hair, using clippers with different guard sizes. Start with a bigger guard (e.g., #3 or #4) and cut upwards from your initial fade line, but don’t go all the way to the top. Leave some space for a smoother fade. Then, switch to a smaller guard (e.g., #2), cutting a bit lower than you did with the bigger guard.
You can then move to an even smaller guard (e.g., #1) to cut closer to the initial fade line. Each time, you’re cutting a little less hair and a bit lower than the previous step. This gradual process of fading creates a seamless transition from the skin to the longer hair on top.
Creating the Undercut
The last part is to create the undercut, which requires more precision. The main idea behind the undercut is to have a stark contrast between the top and the sides. To achieve this, use a clipper on one side and run it from the bottom upwards, stopping just below where your burst fade ends. Repeat the same method on the other side, ensuring both sides are symmetrical.
Styling the Hair
To achieve a polished look, apply some hair styling gel or pomade to the top part of the hair. This styling product will help to create contrast with the faded sides and the undercut. Use your palm and fingertips to spread the product evenly throughout the top of the head and style it to your preference, which can be a slick back, a comb over, or a messy look, amongst others.
Touching up the Burst Fade
Finally, you might want to use your clippers to touch up your fade, especially if there’s a noticeable line between different hair lengths. You can use a half guard or adjust the lever on your clippers to a half-closed position for this touch-up. Always comb through the hair before cutting, to ensure the hairs are evenly distributed.
Creating a Burst Fade Undercut
Creating a burst fade undercut requires precision and patience, but with practice, the steps become fairly straightforward. This stylish haircut provides a clean, modern look that many people appreciate.
After an intricate exploration of the Burst Fade Undercut, you now hold the knowledge to construct this iconic hairstyle from scratch and experiment with variations that best suit your unique features. The guide provided detailed insights into the intricacies involved in cutting, fading, and finally styling your hair to achieve the Burst Fade Undercut. This initial understanding and practical experience equip you well to keep up with this hair trend that continues to evolve with the passing trends. Sculpt your hair, expressing your style statement and personality through your burst fade undercut, a haircut that is bound to turn heads!